Hello,
I was a lipgloss only girl until a few years ago, when I fell in love with lipstick – matt ones, nude ones, bright ones – love them all! Only thing I thought was, it’s hard to get it to last – you don’t want it to feather, crack, or lose it’s vivid colour – but, by taking the time to apply it and getting your lips lipstick ready, you can definitely make your lipstick last longer!
So today’s blog is some top tips for just that!
STEP 1: Exfoliate your lips
If you have dry or cracked skin, your lipstick colour won’t sit well on your lips, it’ll look flaky and dry – not a good look. So, step one, is to exfoliate your lips. My favourite product is the Mary Kay Satin Lips Mask – it’s a mask that goes on for a few minutes, gets rid of dead, cracked skin and helps to renew the skin on the lips. Really fabulous product! Apply a pea sized amount, pat it on, and leave it for 2 minutes. Then, wet a cotton wool pad and remove it.
STEP 2: Feed your lips some moisture!
The other part of the Mary Kay Satin Lips set is the balm, it’s a lovely moisturising balm. Apply it and leave it on for a few minutes to sink in. This product can be worn itself or can be used to prepare the lips for lipstick.
STEP 3: Line your Lips
Line your lips with any lip liner, typically I stick to a nude one as you can use it with any colour, as it’s hard to get a direct colour match, I love the No7 nude one. Pat your lips with a tissue to remove any access balm, then line the lips with the pencil, sort of feather it on, following the line of the lips. This will help to stop your lip colour from bleeding off your lips.
STEP 4: Apply your colour
Using the lipstick itself, apply the colour all over your lips, don’t worry at this stage about being really precise, so you don’t need a brush – this is all about getting the first coat of colour on to the lips. In case any of you are wondering, the colour I have applied whilst doing this blog was Mac, Lady Danger – a fab red colour with a summary orange tint – great on loads of skin tones!
STEP 5: Blot
Rap your lips around a tissue and lightly press down to blot off excess product. What you’re left with here, is your first coat of lipstick. The first coat will sink in to the lips, and act as a sort of foundation, so that if your top coat comes off, you’re left with the colour underneath it, this will help the lipstick last longer and help prevent feathering or cracking.
STEP 6: Powder
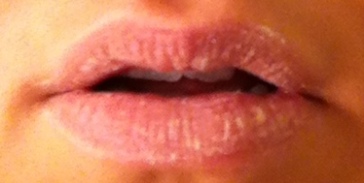
Using a brush, pat some loose powder on to the lips over the lipstick. This is going to act as a layer between the colour and your top coat, helping the colour to absorb and sit better on the lips for longer lasting lipstick colour! It’ll look matt, a little like the above picture.
STEP 7: Apply more colour with a brush
Using a lip brush, apply another, final layer of lip colour, paying attention to the inner and outer lines of the mouth to get a nice shape and colour finish. If you want a little shine, apply a small amount of clear gloss on the centre of the top and bottom lips – this will also make your lips appear fuller – then, you’re done! This is what the final look was on my lips…
Hope that helped! What are your techniques for longer lasting lip colour? What is your favourite lipstick colour at the moment. Would love your comments.
You can use any lipstick with this technique. If you live in the UK and you’d like to order the Mary Kay Sating Lips Duo, please contact me and you can purchase this set for £19 (and it lasts a LONG time!)
Thanks for reading,
Kx


